
Wanderburg Ramming: Safe Contact and Consumption
- Reviewed
- Scope
- Dated evidence; no installed-build testing
Ramming in Wanderburg works best as a controlled hit-and-run action, not as permission to remain pressed against an enemy. The official game description confirms that villages, wandering flocks, and smaller fortresses feed your growth, while enemy castles must be defeated. A Ram can help produce those outcomes, but contact alone does not guarantee damage, consumption, or a kill.
Before charging, confirm that the Ram attack is ready, leave enough space to accelerate and turn, and identify where you will drive after impact. Use Nitro to control the approach or escape rather than spending all of it before reaching the target. If a collision does not finish the enemy, disengage, restore the correct angle, and wait for the relevant Ram action instead of grinding against the target.
This guide covers the ramming and consumption mechanics described by the official description and the recorded Early Access run. It does not provide a Ram Duelist build or a fixed upgrade recipe.
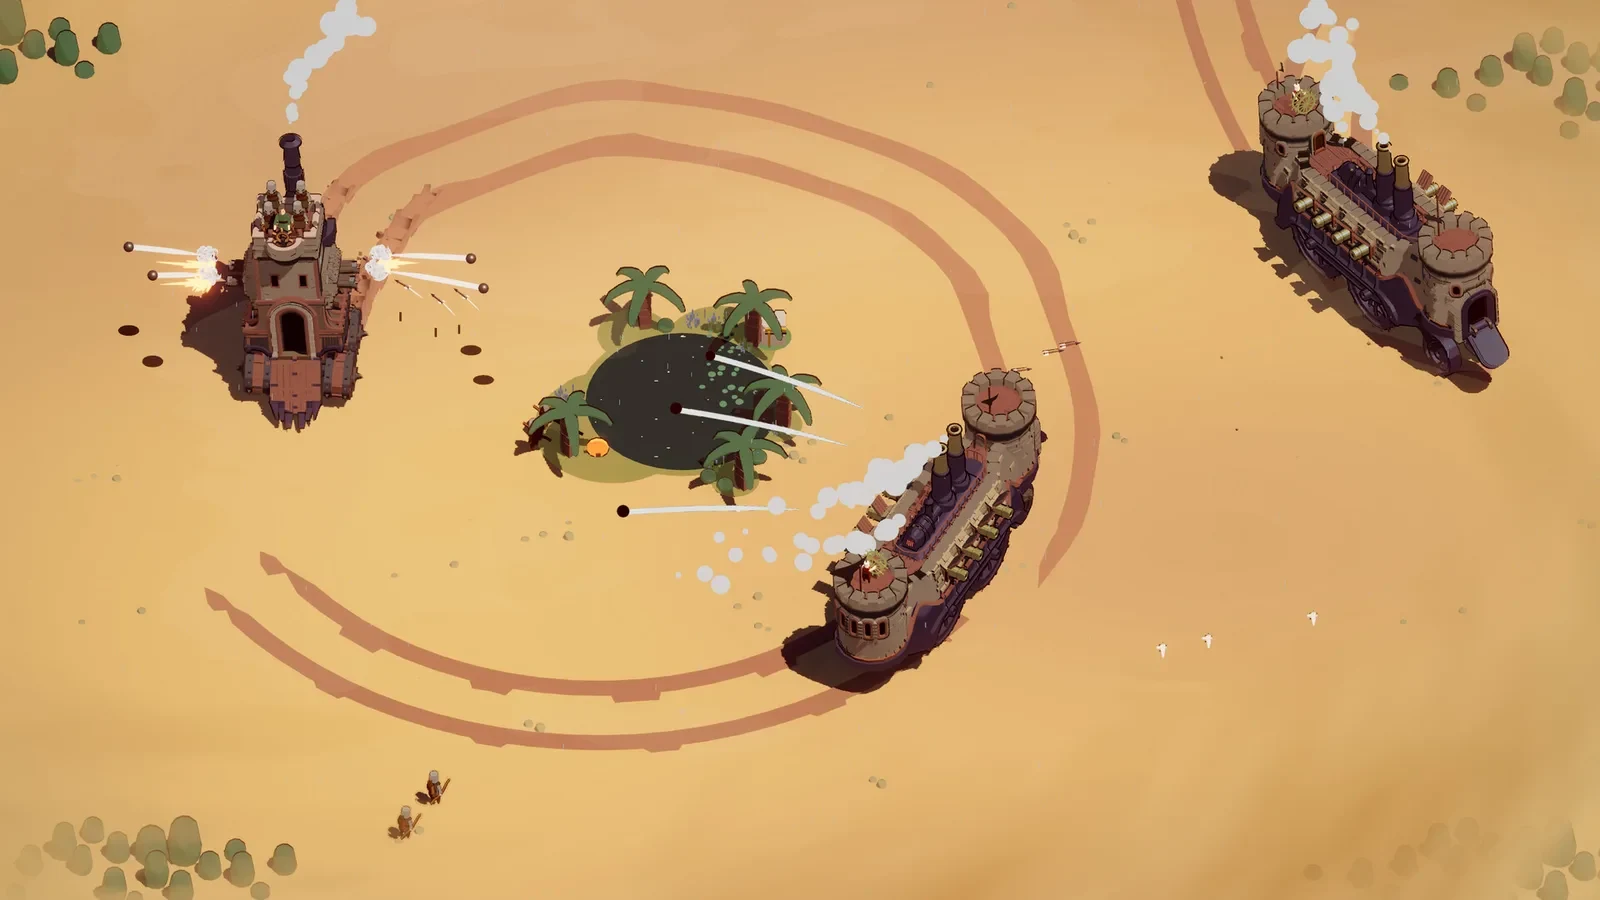
The forward contact mount and the space between castles illustrate why facing and approach matter.
Separate ramming, consumption, and destruction
Wanderburg uses several related outcomes that should not be treated as interchangeable.
| Outcome | What the evidence supports | Practical meaning |
|---|---|---|
| Consumption | The official description names villages, wandering flocks, and smaller fortresses as things that feed your growth. | Chase eligible small targets when you can cross their path without entering a dangerous firing lane. |
| Destruction | Enemy castles are described as targets to defeat, and a recorded results screen counted destroyed vehicles separately from consumed units. | A Ram hit may contribute to a kill without counting as consumption. Other weapons may also finish the target. |
| Knockback | In dated player footage, a nonlethal Ram impact could push an enemy away. | A failed kill can create distance, but it can also move the enemy out of your next attack line. |
| Stalling | The same footage showed the player losing momentum or becoming hung up during poor contacts. | Do not plan around continuous contact damage. Keep an exit route and separate after the hit. |
The distinction matters when diagnosing a disappointing collision. If the target moved but survived, the Ram may have connected without dealing enough damage to destroy it. If a small unit disappeared, that may have been consumption. If a castle died after supporting fire landed, the Ram was not necessarily the sole cause.
Read the Ram state before committing
A dated Early Access player run showed separate automatic and activated Ram behavior. In that run, the player first selected an automatic Ram damage upgrade because the initial automatic action was not dealing damage. Later observations indicated that damage occurred while the Ram was extended rather than throughout ordinary hull contact. Those details are useful for reading the interface, but they are player observations from one recorded run, not a promise that every current starting configuration behaves identically.
Use the current in-game card and visible cooldown state as the authority for your run:
- Check whether the offered effect applies to the automatic attack, the activated ability, or both.
- Read whether the choice adds flat damage, changes a multiplier, extends an effect, adds a dash, or increases knockback.
- Do not assume that an automatic Ram animation deals damage before its card or current tooltip says it does.
- Do not assume that maximum driving speed automatically multiplies Ram damage. Speed clearly changes approach geometry and escape time, but a direct speed-to-damage rule is not established by the official description or the recorded run.
- Watch the Ram itself. If the damaging action depends on its extension, ordinary nose-to-target contact is not a substitute for timing the attack.
This check prevents a common mistake: aiming correctly while using the wrong Ram state. It also explains why two similar-looking collisions can produce different results when one occurs during the active attack window and the other happens after the Ram retracts.
Account for the official Ram and Nitro changes
Official Hotfix 0.9.8, posted on September 10, 2026, fixed inconsistent Module Ram damage. The same update changed Nitro so regeneration begins 0.5 seconds after boost use. These official notes do not establish another specific Ram rule, but Wanderburg remains in Early Access, so the current tooltip and observed behavior should still take priority if they differ from older footage.
The Nitro delay has an immediate tactical consequence. Repeatedly tapping boost does not provide uninterrupted regeneration. If you empty Nitro during the approach, you may reach the target without enough mobility to leave a cannon line, clear a cluster, or correct a missed angle. Build a short recovery pause into the route whenever the situation permits.
Use a safe ramming approach cycle
Treat every serious Ram attempt as a cycle with a setup, one committed impact, and a recovery phase.
-
Identify the target and its dangerous side. Look for the direction of its main attack, nearby projectile paths, spikes, surrounding units, and obstacles. Recorded footage showed that frontal weapons, broadside fire, spiked enemies, and dense archer groups could punish an otherwise strong Ram approach.
-
Choose an open exit before turning inward. Your route after contact should lead into clear ground, not toward the map edge, a second castle, or a wall of small enemies. A target that is easy to hit can still be unsafe if the collision leaves your castle trapped.
-
Wait for the relevant Ram action. If the activated ability is on cooldown, continue circling rather than substituting normal hull contact. If the automatic Ram is the intended damage source, confirm that its attack is about to occur before you enter contact range.
-
Preserve a Nitro reserve. Use only the boost needed to establish the line. Nitro can also be the tool that pulls you away after a miss, escapes a dangerous close-range effect, or carries you across an exposed firing lane.
-
Begin the turn early. Larger castles were visibly less agile in the recorded run, and a wide turning radius made late corrections unreliable. Point the castle toward the target before entering the final approach instead of attempting a sharp turn at contact range.
-
Commit when the lane is stable. Avoid weaving through multiple enemies during the last moment. A clean line makes it easier to place the extended Ram on the intended target and reduces the chance that a minor unit absorbs the approach.
-
Pass through or peel away. After the impact, continue toward the planned exit. Do not immediately reverse into the same target or remain against its hull. Nonlethal contact may push it, rotate the fight, or stop your own movement.
-
Reassess before the next pass. Check health, Nitro, cooldowns, new projectile lanes, and the target’s position. Supporting weapons may have changed its health or finished it while you were disengaging.
Match the approach to the target
Small consumable targets and hostile castles require different decisions.
For villages, flocks, and other eligible small targets, use a shallow interception line that lets the castle continue into open space. Chasing a fleeing target through incoming fire is rarely worth losing the exit route. If several small units are spread across the field, take the group that fits your current direction rather than making a tight reversal for every remaining target.
For ordinary hostile vehicles or fortresses, inspect the space behind them as carefully as the target itself. A nonlethal hit can push the enemy farther away, so aim only when that new position will remain reachable. If the target is protected by spikes or another collision hazard, soften it with available attacks or wait for a safer angle instead of forcing direct contact.
For large enemies and bosses, abandon the assumption that one strong pass will produce a kill. The recorded Ram-focused run repeatedly needed several approaches, supporting damage, or both. One boss survived the initial collisions even after substantial Ram investment. Enter from a side that avoids the most obvious attack, land one timed hit, and leave before preparing another pass.
Dense ranged groups deserve extra caution. The player footage showed archers aiming ahead of the moving castle and becoming more dangerous as the castle grew and turned less sharply. Against that pressure, a long straight charge can make your movement predictable. Break the line, reposition, and approach only after the projectile lane becomes manageable.
Recover from a missed or nonlethal impact
A failed Ram becomes dangerous when the player treats it as an invitation to keep pushing. Use the visible result to choose the next action.
- The target was knocked away: Let it travel, turn through open ground, and establish a new line. Chasing immediately can force a bad angle while the Ram is unavailable.
- Your castle stopped against the target: Steer out laterally and use boost only when it creates separation. Remaining in contact can expose you to close-range attacks without confirming additional Ram damage.
- The Ram passed beside the target: Continue along the exit route. A wide recovery loop is safer than an emergency turn through the enemy’s firing arc.
- A smaller unit intercepted the charge: Clear the area and reset. Do not assume the intended target also received the full hit.
- The enemy survived with dangerous attacks active: Create distance and use other available damage while the Ram recovers. The goal is to prepare the next clean impact, not to preserve a Ram-only damage record.
- You spent all Nitro before impact: Prioritize open ground and allow regeneration to begin. Avoid another commitment until you again have enough mobility to escape.
If the same target repeatedly causes stalls, change the angle rather than repeating the same input. Approach from a less crowded side, start the turn earlier, or wait until supporting attacks reduce the risk of a nonlethal collision.
Apply the mechanics on the next run
Use this short sequence when a good Ram target appears:
- Verify whether the current Ram damage comes from the automatic attack, the activated ability, or both.
- Read the current tooltip instead of relying on an older video’s values.
- Mark the enemy’s dangerous facing and the clearest escape lane.
- Wait until the Ram action and enough Nitro are available together.
- Align early, then make one committed pass during the damaging state.
- Continue into open space after contact, even if the enemy survives.
- Check whether the result was consumption, destruction, knockback, or a stall.
- Re-enter only after cooldown, Nitro, target position, and projectile lanes are safe again.
That cycle keeps ramming useful without confusing ordinary collision with an active Ram hit. It also turns consumption into a route-planning decision: take the targets that advance growth while preserving control of the castle, then leave the unsafe approach for a later pass.